

Overview
The Contacts section in your Gaviso dashboard allows you to manage every person your business interacts with. From leads and clients to partners and collaborators, creating contact records ensures you have the information you need for outreach, segmentation, and personalized automation.
Accessing the Contacts Page

Log into your Gaviso account by visiting https://app.gaviso.io or from the main website https://gaviso.io. Then, click the log in button located at the top right corner of the page.
In the left-hand menu, select Contacts.
You will see a searchable and filterable list of all your saved contacts.
Adding a New Contact
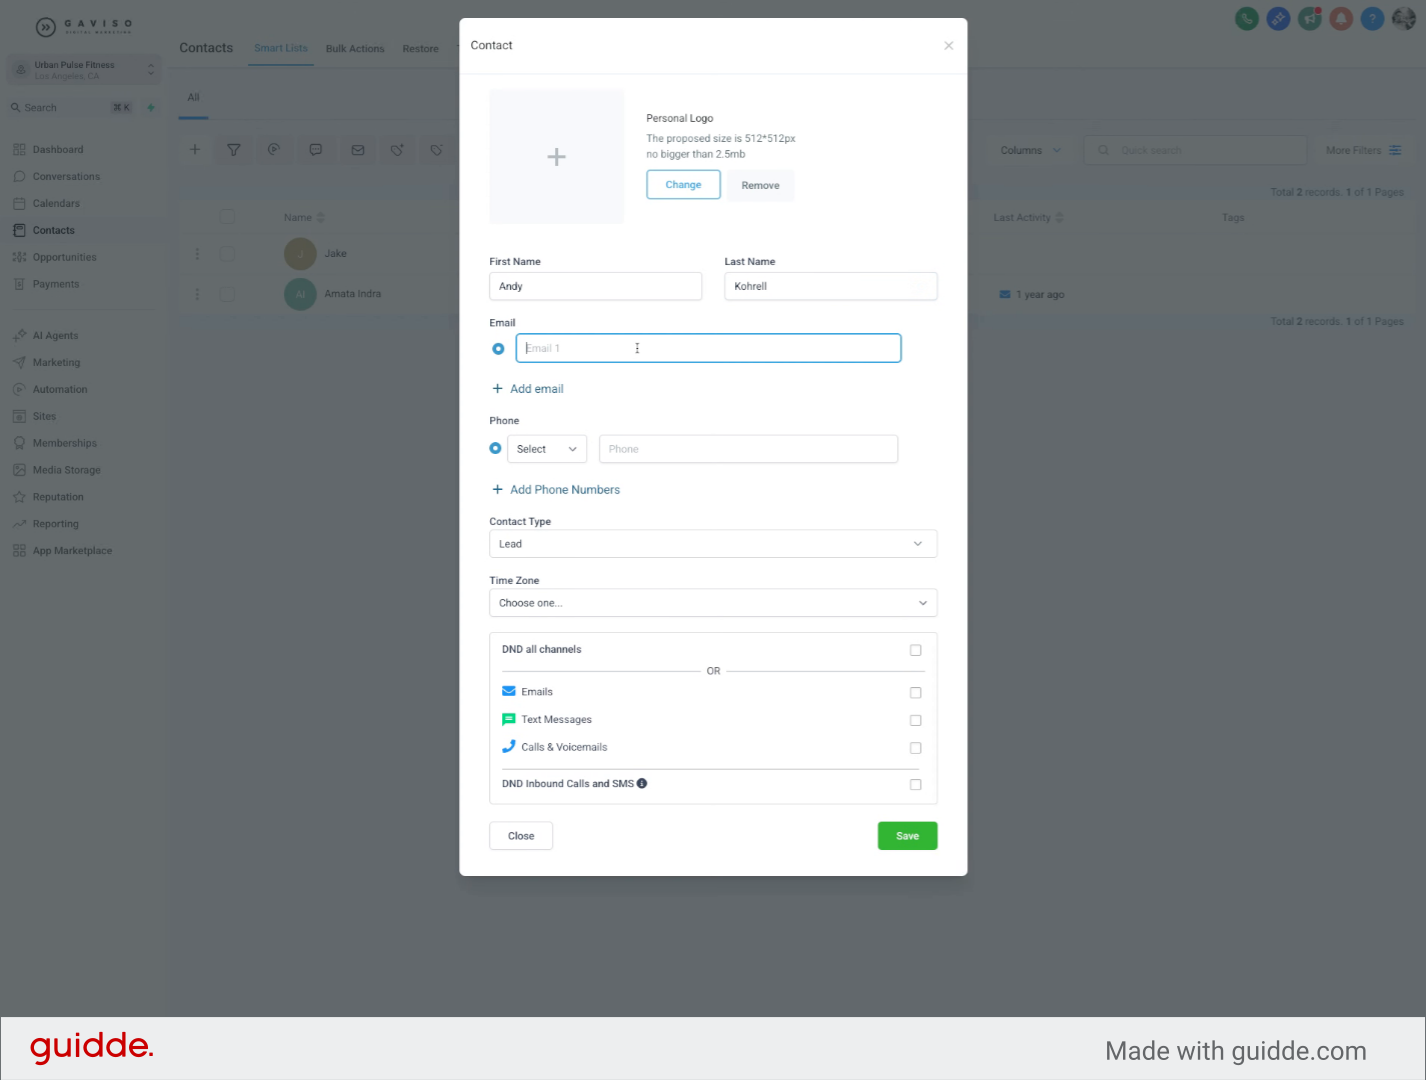
Create a new contact by entering essential details such as first name, last name, and email address to expand your contact list efficiently.
1. Go to app.gaviso.io
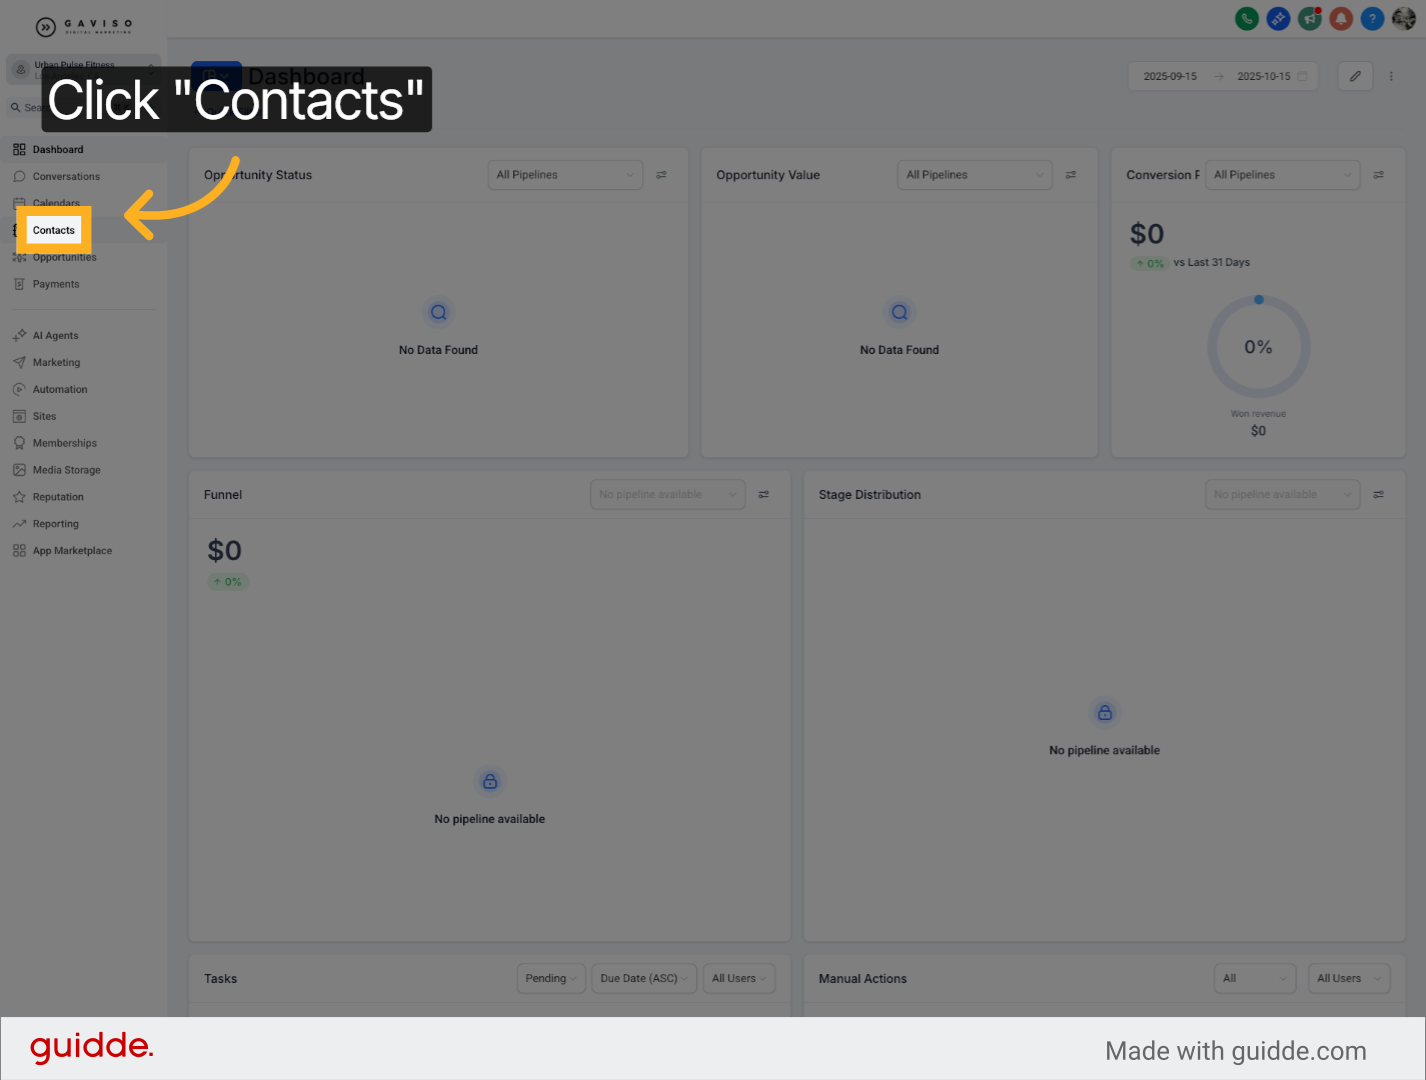
2. Navigate to Contacts Section
Click the Contacts section to access your contact management area where you can view and manage existing contacts.
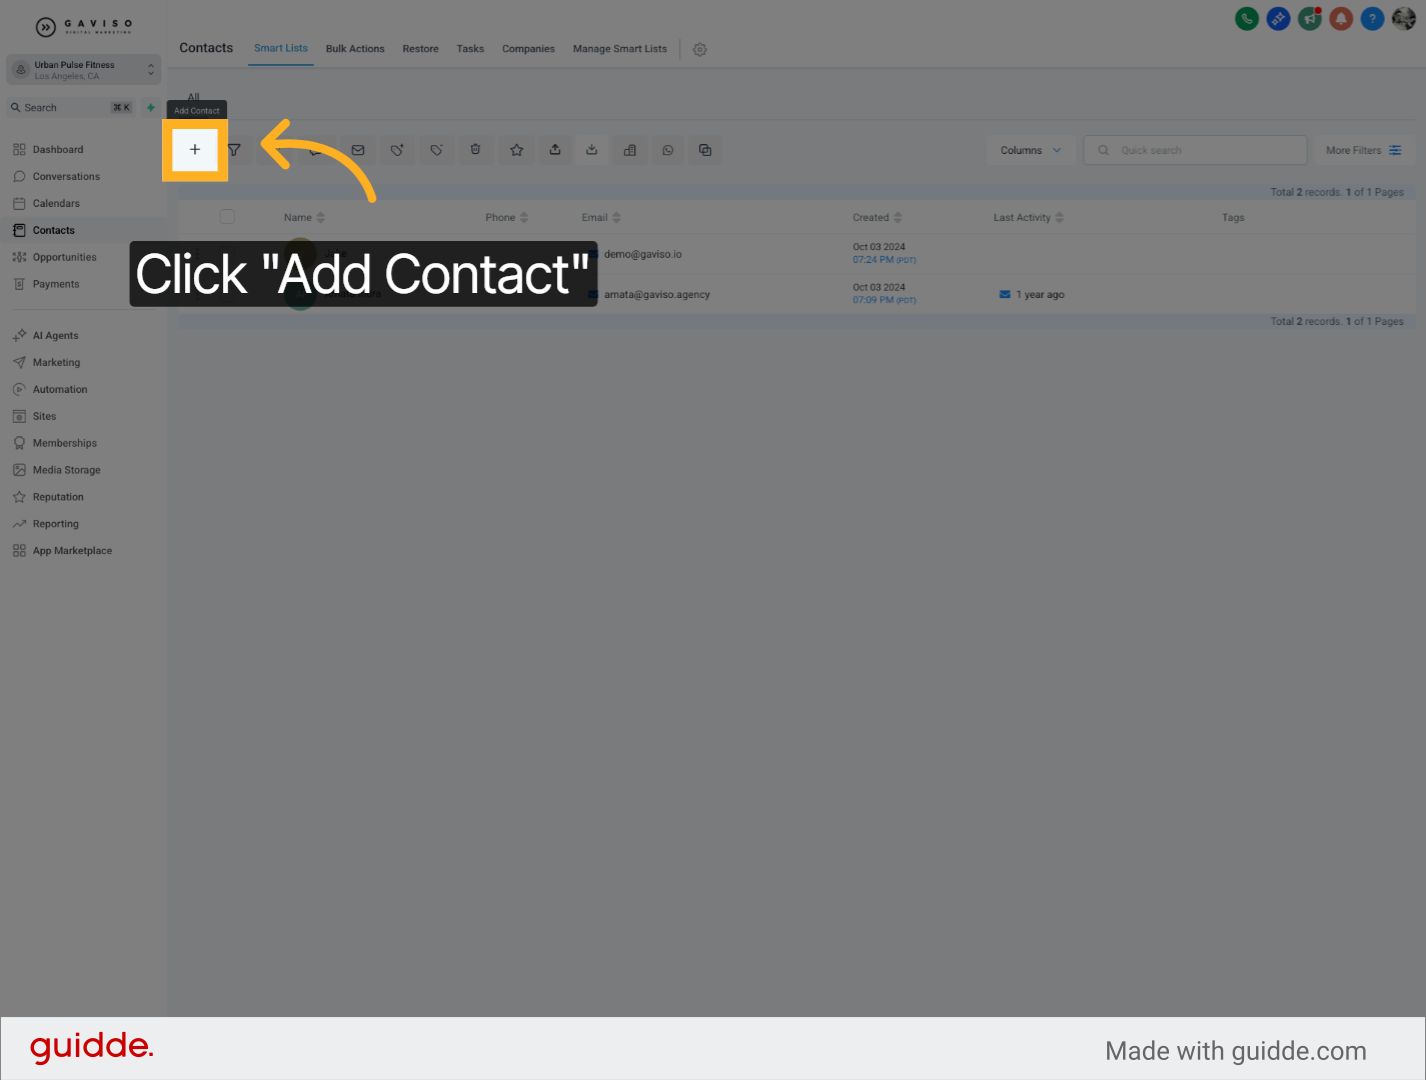
3. Open Add Contact Form
Click the Add Contact button to open the form for creating a new contact entry.
4. Enter First Name
Fill in the First Name field with the contact's first name.

5. Enter Last Name
Fill in the Last Name field with the contact's last name.
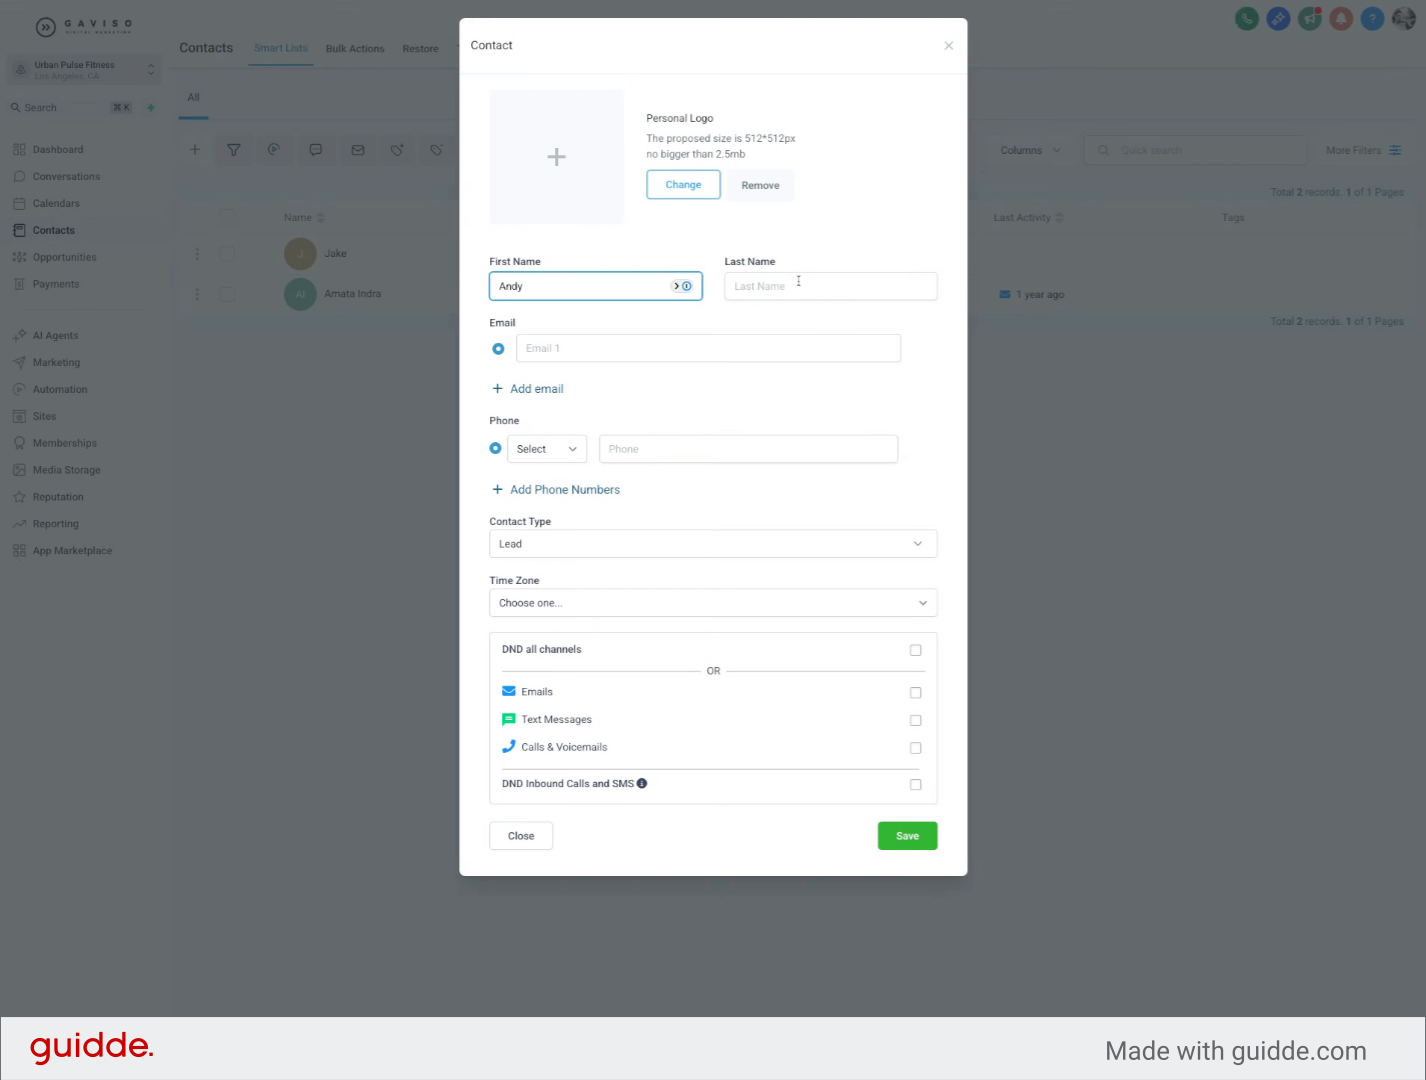
6. Enter Email Address
Fill in the Email field with the contact's email address.
7. Save New Contact
Click the Save button to store the new contact information and complete the creation process.
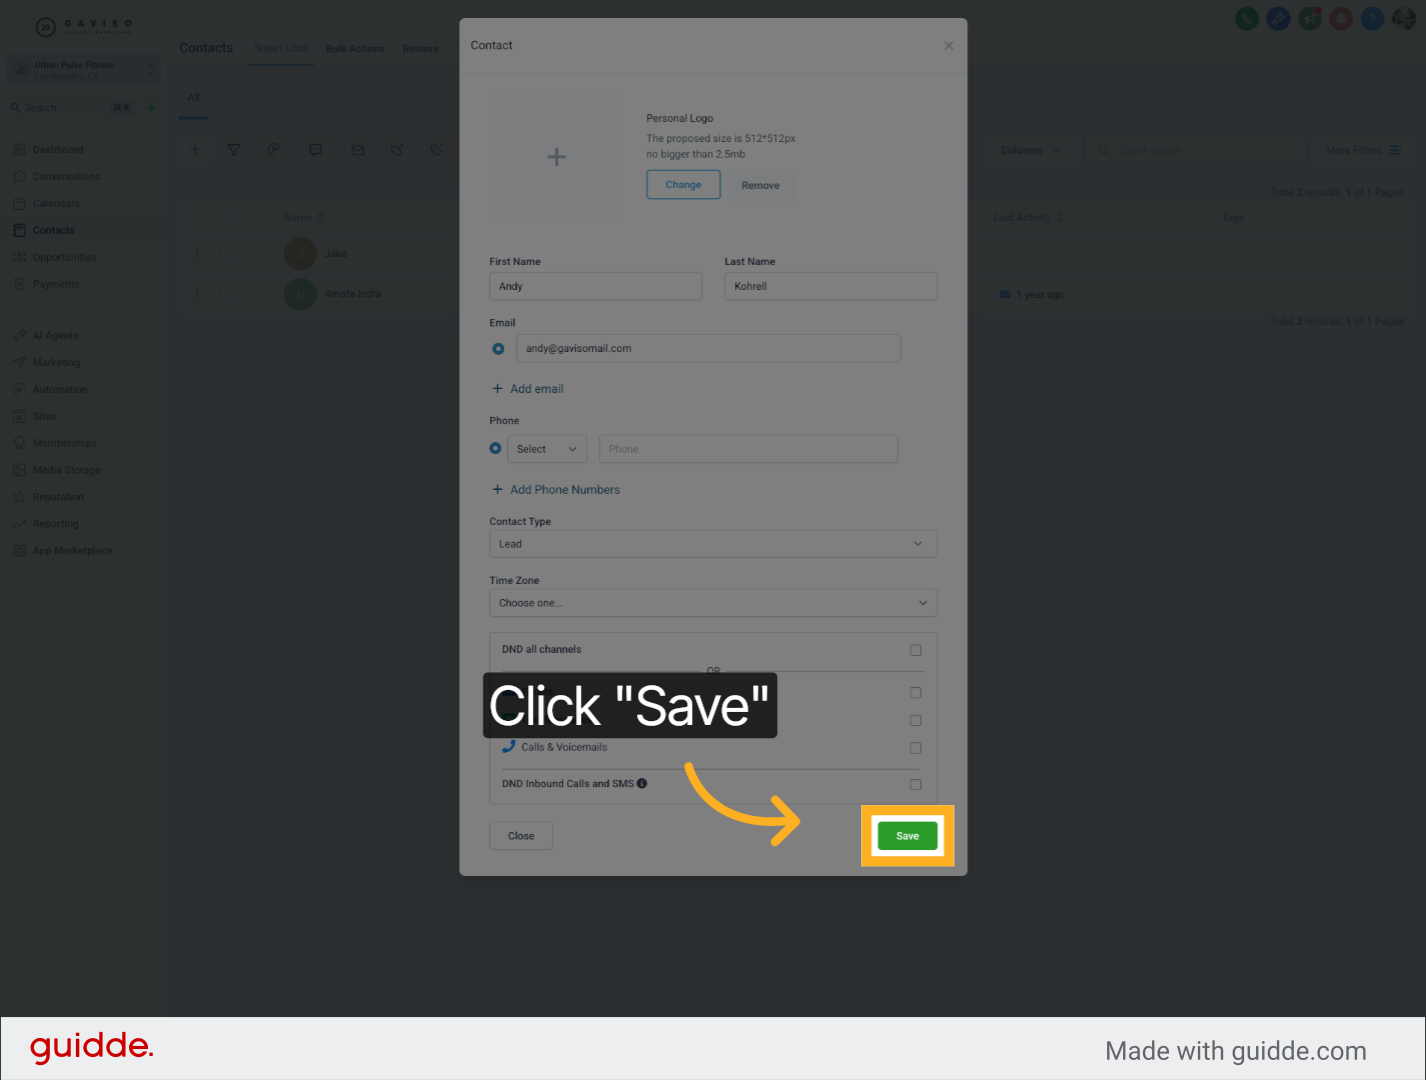
You have successfully created a new contact by entering the first name, last name, and email address, then saving the information. For more details on managing contacts, see related articles in the knowledge base.